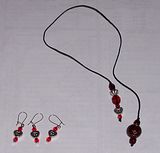
Here is my original angel bookmark pattern. And the usual disclaimer:
This pattern is copyrighted material. You may print it for your own use, but please don't post it to other websites or sell my original pattern as your own. You can link to this page, but please don't post the pattern on other websites or groups. Yadda Yadda. :o)
**If you like my blog and patterns, please vote for me on the Crochet and Hook list. Vote by clicking the blue box towards the top in the left margin of my blog. Thank you so much!! Let me know what you think of my patterns -- just click the email link (also in the left hand margin).**
Angelic Charm Bookmark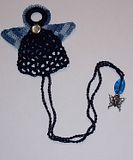
Supplies:
#10 or larger crochet thread in two coordinating colors
1 inch plastic ring
1 nugget bead, or other large bead
1 charm of your choice (optional)
1 button of your choice
Size 8 steel hook, or size needed for thread size
Head:
Attach thread to 1” ring with an sc.
Row 1: sc around ring until totally covered, join, ch 2, turn
Body:
Row 1: (Ch counts as first dc now and throughout) dc in next 3 stitches, ch 2, turn (4 dc)
Row 2: dc in 1st dc, dc in next 2 dc, 2 dc in last dc, ch 2, turn (6 dc)
Row 3: sk 1st dc, V-stitch (dc, ch 2, dc) in next 4 dc, dc in last dc, ch 2, turn (10 dc, 4 ch2 sp)
Row 4: sk 1st dc, V-stitch in ch 2 sp of previous V-stitch, repeat across to last dc, dc in last dc, ch 2, turn
Rows 5-8: Repeat row 4. At end of Row 8, finish off.
There should be 9 spaces at the bottom of the angel’s skirt.
Join thread in the middle space with a sl stitch. Using the ch stitch, make a long chain and FO, leaving a 4 inch tail. Join thread in the same space, and make a long ch of the same length, also leaving a 4 inch tail. Thread both ends through a large nugget bead and push the bead up against the ends of both long chains. Then tie on your choice of charm at the bottom.
Wings (worked separately, then attached to body):
With coordinating thread color:
Ch 5, join to form ring.
Row 1: ch 2, 1 dc into ring, ch 3, (2 dc, ch 3) 3 times, join in 1st dc
Row 2: sl st over to next ch 3 space, ch 2, 1 dc, ch 3, 2 dc in ch 3 sp, dc in next 2 dc, *2 dc, ch 3, 2 dc in ch 3 space, dc in each dc across to next ch 3 sp, repeat from * around, join in 1st dc.
Row 3: sl st over to next ch 3 space, ch 2, dc, ch 3, 2 dc in sp, * dc in each dc across to next ch 3 sp, 2 dc, ch 3, 2 dc in ch 3, repeat from * around, join in 1st dc.
Rows 4 - 6: Repeat row 3. At end of row 6, FO, leaving a long tail.
Turn square so that the corner with the tail is at the bottom, forming a diamond. Fold the opposing corner down to form a triangle. Putting fold at the top, place behind angel body so that the fold lines up with the top of the neckline. Using a small button of your choice, join wings to angel body.
Skipping stitches at the body’s neckline, join coordinating thread color (used for wings) with an sc in sc on ring, leaving a 4 inch tail. Ch 1, sc in next sc. Continue ch 1, sc in next sc around to where the ring meets the neckline on the other side. FO, leaving a 4 inch tail.
Working on back of angel, Using 4” tails and a needle, run thread through a couple stitches on back on wings and then up through a couple stitches on head. Do this on both sides. This will secure the stitches and also give the head and wing area a more finished look.
My friend
Karla was my pattern tester. She did a great job and helped me tremendously. Here's the bookmark she made:

Thanks Karla!!!
Please feel free to leave comments and suggestions about this pattern. I can also be reached by email using the link in the left sidebar of my blog. :o)
TTFN!
Juli













 Southern Knit Bloggers


